 Step by Step Guide
 How to wash your car at home without scratching the paint
The complete walkthrough for washing your car at home: the two-bucket method, the right order of the job, how to dry without marking and what to never do to the paint.
Updated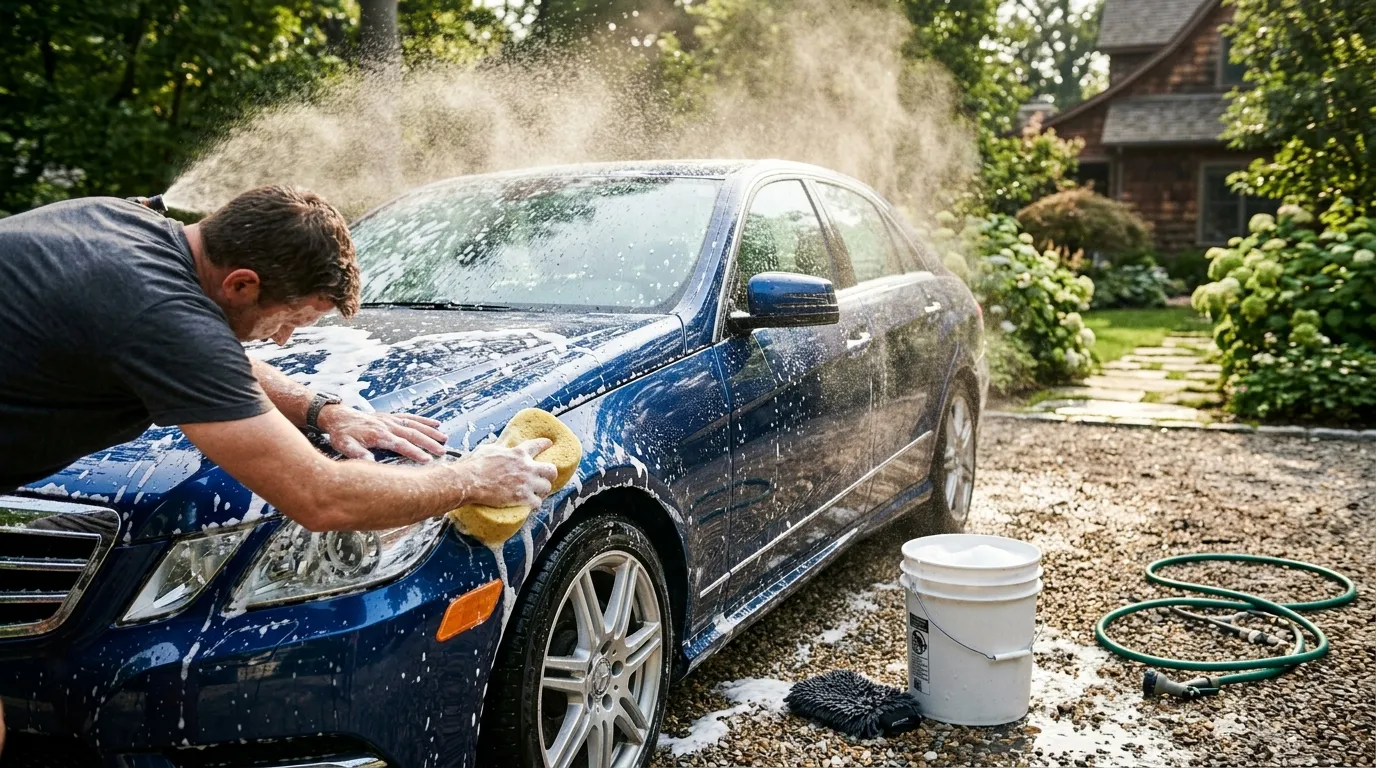
Washing your car at home seems too simple to go wrong — until you see a hazy finish full of circular swirl marks, or watch the shine fade. The irony is that most paint damage isn’t from the road: it’s from the wash itself. An old sponge grinding grit, one bucket of water that gets dirty and stays dirty, and the rinse hidden in the same foam.
This guide covers the two-bucket method and the right order of the job, so you finish with a clean, glossy, scratch-free car. It also shows how to dry without leaving marks, how to care for the paint, and when the best move is to leave the car dirty.
The mistake that scratches paint: scrubbing the whole car with the same cloth and the same water. Every pass dumps more grit into the suds, and grit pressed onto the paint works like sandpaper. The two buckets and a microfiber mitt exist precisely to stop that.
Before you start
Set everything out before you get the car wet. You don’t want to discover mid-wash that you’re out of shampoo or that you only have one bucket.
- Two clean buckets (never ones used for construction or floor mopping)
- Microfiber wash mitt (not that porous kitchen sponge)
- pH-neutral car shampoo
- Hose with good pressure or a pressure washer
- Large clean microfiber towels for drying
- Wax or sealant, if you want protection
- A shaded spot, ideally
Set up the two-bucket station
The whole trick is keeping grit off the paint. So you use two buckets: the first holds soapy water (the wash bucket); the second holds plain clean water (the rinse bucket). If you have them, put a grit guard or particle separator in the bottom of each — that’s where the sand settles.
The logic is simple: on each pass the mitt goes from the wash bucket to the paint; before going back, dip the mitt in the rinse bucket just to knock the grit it picked up off. That clean rinse water is what stops the scratches. With a single bucket, every grain that leaves the paint goes straight back onto the surface.
Do the wheels and tires first
Start with the parts that aren’t paint. Spray a wheel cleaner onto the wheels and tires and work them with a dedicated brush, using tools that never touch the bodywork. Let it sit for a few minutes, then rinse thoroughly.
Doing them first keeps brake dust, iron deposits, and the cleaner from splashing onto already-washed paint. Just be careful not to spray the wheel cleaner onto the paint — if you do, rinse it off right away. Once the wheels are clean, wash your mitt and brush again before touching the car.
Rinse the loose dirt off the car
With the car dry or still damp from the wheels, do a general top-to-bottom rinse with plain water, no soap. The point is to lift the loose dust and grit before a mitt presses them into the finish. Start at the roof, move down across the windshield, hood, and trunk lids, and finish on the lower body panels.
If the car is heavily soiled with sand or mud, consider a pre-wash foam or snow foam, but never skip the initial rinse. That step is what prevents you from sanding the paint into the dust.
Wash in soap from the top down, in sections
Now the main event. Dunk the mitt in the wash bucket, squeeze out the excess, and glide it over the surface with light strokes, one section at a time — roof, then hood, side panels, and finally the rear. Washing top to bottom follows the dirt: the upper body is the cleaner region and the lower panels are the dirtiest.
Don’t scrub hard or rub in aggressive circles; slide the mitt in straight lines, smoothing over the panel. Don’t let the foam dry on the paint: work section by section, and if the soap dries it can leave spots that only come off with a polish. After each section, go back to the rinse bucket before reloading the mitt with suds.
Rinse and do the glass last
Rinse each section as soon as you finish it, or do a top-to-bottom final rinse. Check the spots the foam left on trim, rubbers, and hinges. The glass goes last, with clean water and the mitt or a dedicated glass cloth, so you don’t leave a soapy film.
If you have a degreaser or mild soap, use it on the mirrors and headlights, but rinse it off right away. Leave the rocker panels and the underside of the wheel arches for last, because that’s where the grime is heaviest.
Dry without leaving marks
Drying badly is what makes a freshly washed car look dirty. Use a large clean microfiber towel, stroking top to bottom and blotting rather than scrubbing, and flip the towel to a clean side each pass. The result: no water droplets baking and spotting.
A leaf blower or small handheld blower is a great trick for pushing water out of seams and details the towel can’t reach, like mirrors, grilles, and trim. Follow with a quick towel pass to pick up what’s left. Whatever you let air-dry, will spot.
Protect the paint with wax or sealant
Once the car is completely dry and in the shade, apply the protection. Wax or sealant creates a layer that makes water bead and run off, and it makes the next wash easier. Work one panel at a time with a microfiber applicator, let it haze, and buff it off with a clean, dry towel.
Don’t overdo it: a car with too much wax feels tacky and gets streaky. A coat once a month is plenty for a daily driver. With the paint protected, subsequent washes go faster, because dirt doesn’t stick the same way.
Common mistakes that damage the paint
- Washing in the sun and letting the soap dry. Hot paint and fast drying leave water spots that only come off with a polish.
- Using the same water and the same sponge from start to finish. Grit goes back and forth, and every pass scratches.
- Wheel brush on the bodywork. A wheel brush holds iron and brake dust; anything it touches gets scratched.
- Drying with a regular towel or a worn chamois. Plain towels shed lint, and an old chamois pulls grit into the finish. Use microfiber.
- Forgetting to refresh the rinse bucket. The second bucket only works if you swap the water once it darkens. If it turns into a bucket of grime, the method is gone.
When not to wash
Knowing when not to wash matters as much as knowing how. Avoid it when the car is hot — right after a long drive or sitting in the sun — because the paint, the soap, or a wax stripped by heat can stain. Skip it if rain is coming, which makes the wash a waste. And don’t wash when there’s a frost risk: water left in the drains can freeze and seize the wiper rubbers.
After the wash
Store your mitt and towels clean and dry, not folded in a dusty spot: dirty microfiber or softener-treated microfiber turns into sand the next time. Take a close look at the paint and note any scratches — they’re far easier to fix with a light polish now than once they’ve gone deeper.
If any foam is still sitting in the door jambs and seals, dry it and treat the rubbers with a conditioner. That keeps the paint protected and stops the rubber from freezing to the door in cold weather.
Frequently asked questions
Can I wash the car in direct sunlight?
Avoid it. In strong sun the paint heats up, the soap and water dry mid-wash and leave hard water spots and baked-on wax that are tough to remove. Wash early in the morning, late in the day, or in the shade.
Can I use dish soap instead of car shampoo?
No. Dish soap degreases and strips the paint's protective layer, leaving the finish dull and more prone to scratches. Use a pH-neutral shampoo made for cars, which cleans without removing the protection.
How often should I wash the car?
Every couple of weeks in the city, at most. Washing too often with the wrong products also wears the paint, so it's not about washing more — it's about washing right.
Is an automatic car wash safe for the paint?
The brush-style ones can scratch, because the brushes hold grit from every car that's gone through. When you can, prefer a hand wash or a touchless wash that uses high-pressure water instead of brushes.
Informational content. For risky situations or technical, legal or medical doubts, talk to a professional.