 Step by Step Guide
 How to jump-start a car safely with jumper cables
Learn the correct jumper-cable order, when a battery is unsafe to jump, how to disconnect without a short circuit, and what to test after the engine starts.
Updated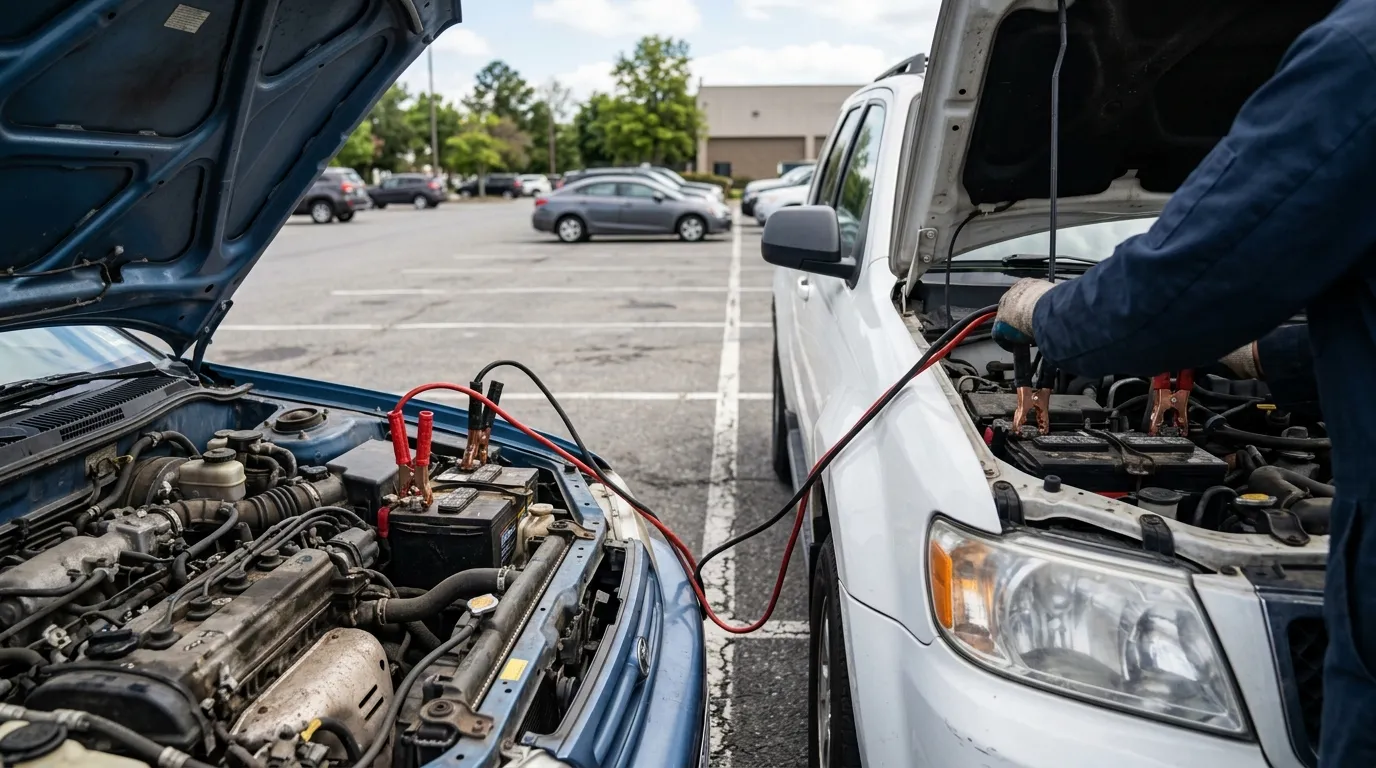
Turning the key and hearing only a click often means the battery cannot supply enough power to the starter, but that symptom does not prove the battery is the only problem. A light left on, a loose connection, a charging-system fault, cold weather, or a worn battery can all leave the car unable to crank.
A jump-start gets the engine running so you can reach safety and diagnose the cause; it does not repair whatever drained the battery. The process below is for compatible 12-volt passenger vehicles whose manuals permit cable starting. Remote terminals, hybrids, and electric vehicles require their manufacturer’s specific directions.
Do not attempt a jump if either battery is swollen, cracked, leaking, unusually hot, strongly odorous, frozen, or badly damaged at a terminal. Keep flames, cigarettes, and sparks away, protect your eyes and hands, and call for assistance. Battery electrolyte is corrosive, and a damaged battery may release flammable gas.
Confirm that a jump-start is appropriate
Open both hoods without touching terminals and inspect the batteries. Stop if you see liquid, case distortion, severe corrosion that prevents a firm connection, or loose vehicle cables. A car involved in a collision, flood, smoking electrical event, or previous reversed connection needs professional assessment.
Read the jump-start section in both owner’s manuals. Confirm compatible voltage and locate the approved connection points. Some vehicles provide a positive post and a separate ground under the hood even though the battery is elsewhere; use those designated points.
Position and shut down both vehicles
Park the donor close enough for the cables to reach without tension, but do not allow the vehicles to touch. Choose firm ground with ventilation and protection from moving traffic. Set both parking brakes, select Park or Neutral as appropriate, and switch off ignitions, lights, climate control, audio, and accessories.
Uncoil the jumper cables and inspect their insulation and clamps. Do not use a lead with exposed copper, a loose clamp, melted insulation, or signs of overheating. Keep all four clamps separated so none can touch another clamp or stray metal while you arrange them.
Identify positive by the “+” marking and usually a red cover. Do not rely only on an old cap’s color. Find the disabled car’s specified ground point as well: solid unpainted metal away from the battery, fuel lines, fans, belts, and pulleys.
Connect positive to positive and negative to ground
With both engines off, make one connection at a time while controlling every loose clamp. Use this order:
- Attach one red clamp to the disabled vehicle’s positive terminal.
- Attach the other red clamp to the donor vehicle’s positive terminal.
- Attach one black clamp to the donor vehicle’s negative terminal.
- Attach the final black clamp to the disabled vehicle’s approved ground point, not beside its battery unless its manual explicitly says otherwise.
Gently check that each clamp has a firm bite without twisting the terminal. Route the leads clear of fans, belts, and pulleys, which may move without warning once an engine starts. If a clamp slips, a cable heats rapidly, smoke appears, or sparking continues, do not improvise. Stop when it is safe and get help.
Start the donor, then the disabled car
Review all four connections before touching either ignition. Start the donor vehicle and let it idle for the interval its manual recommends. Do not race the engine in an attempt to force extra charge; high rpm cannot correct a poor clamp connection and may add stress to the electrical systems.
Try to start the disabled car for only a few seconds, then pause before another attempt. The pause helps prevent the starter and cables from overheating. If it does not crank, turn the ignitions off and recheck that the clamps are secure on the designated points without changing the order.
Stop after a small number of unsuccessful attempts. A single solid click despite good cable contact can point to the starter, a connection, or another fault. Endless attempts may drain the donor and overheat components, so roadside assistance and diagnosis are the proper next step.
Watch both vehicles after the engine starts
Once the disabled engine runs, leave both vehicles stationary and stable. Check the instrument panel, engine sound, and smell before handling the clamps. A battery or charging warning, rough running, smoke, burning odor, belt noise, or very hot cables means the process should be stopped safely and assessed.
Do not assume the car is fixed. Its alternator must now power the vehicle and replace some energy, but it is not the right recovery charger for every deeply discharged battery. Keep unnecessary electrical loads off until the cables are removed, and never move either vehicle while they remain connected.
Before disconnecting, make sure clothing, hair, hands, and tools are clear of moving parts. Agree with the other person that nobody will rev an engine, move a car, or handle a clamp at the same time.
Disconnect in exact reverse order
Remove each clamp without allowing it to touch another clamp or vehicle metal. The reverse order is:
- Remove the black clamp from the ground point on the vehicle that received the jump.
- Remove the black clamp from the donor vehicle’s negative terminal.
- Remove the red clamp from the donor vehicle’s positive terminal.
- Remove the red clamp from the formerly disabled vehicle’s positive terminal.
Hold clamps by their insulated sections. Move each free end away from the engine compartment immediately, and coil the cables only after all four are disconnected. Check that no tool or cloth remains under either hood.
Close terminal covers and both hoods securely. If a vehicle’s manual specifies an engine shutdown or a different manufacturer-controlled detail during removal, that instruction takes priority because electrical designs vary.
Test the cause and decide about replacement
If the engine runs normally with no warnings, follow the manual’s advice on driving or charging. Avoid shutting it off before reaching a safe place where help is available, but do not continue with abnormal temperature, a charging warning, fumes, smoke, or loss of power.
Have the battery and charging system tested. A merely discharged battery may recover with an appropriate charger; another may accept a jump and fail again hours later. The check should also consider a light left on, an accessory drawing power when parked, loose terminals, or an alternator that is not charging correctly.
Replacement is justified by case damage, leakage, swelling, or a proper test showing inadequate capacity or starting current. Age alone is not a complete diagnosis. Record when the failure happened and under what conditions so a technician can separate normal wear from a vehicle fault.
Common mistakes
- Reversing positive and negative. Incorrect polarity can cause violent sparking and electrical damage.
- Making the last connection at the dead battery. The specified ground point keeps a possible spark farther from battery gases.
- Letting the vehicles touch or moving them while connected. This adds avoidable electrical and mechanical hazards.
- Assuming one successful start proves the battery is healthy. Its condition and the cause of discharge still need testing.
Finish with a plan, not a guess
Store the cables dry and note the event. Correct connection, reverse disconnection, and follow-up testing are what keep the same failure from returning in a worse location.
Frequently asked questions
Can I attach the black clamp to the dead battery's negative terminal?
Prefer the ground point named in the manual, on solid unpainted metal away from the battery. This keeps the possible final spark away from battery gases. Use the negative terminal only when the vehicle manufacturer specifically directs you to do so.
How long should I drive after the engine starts?
No single driving time guarantees a full recharge, and a short trip may not restore a deeply discharged battery. Follow the manual and have the battery and charging system tested, especially when the reason for the discharge is unknown.
Can any car serve as the donor vehicle?
No. The electrical systems must be compatible and both manuals must allow the procedure. Hybrids, electric vehicles, and cars with remote terminals can have special restrictions. When uncertain, use an approved jump pack or roadside assistance.
When does the battery need replacement?
Replace a physically damaged battery or one that proper testing shows cannot hold charge or provide the required starting current. Repeated discharge also calls for checks of the charging system and power draws while the car is off.
Informational content. For risky situations or technical, legal or medical doubts, talk to a professional.